Basic Configuration
Login Device
By default, AsterNOS devices support login through both the serial console and SSH (Secure Shell).
When initially logging into the switch, you will need to use the console port (referred to as the serial port below) to establish a connection. After configuring the management interface's IP address, you can then use SSH to log into the switch. Local login via the serial console is the fundamental method for accessing the device, and it forms the basis for configuring other login methods. The specific steps are as follows:
Connect the Lines
This series of switches utilize RJ-45 connectors for serial console connections. The distribution of serial console ports varies among different models. Generally, they can be found on the front panel of the device, while some might be located on the rear panel, often marked with the label "CON."
After the device is powered on, connect the switch's serial console port to a server or PC. It's important to ensure that the communication parameter settings of the user terminal match the default configuration of the switch's serial console to establish communication. The default values for each parameter are as shown in the table below:
Parameter | Default Value |
|---|---|
Baud Rate | 115200 |
Flow Control Method | No flow control |
Verification Method | No verification |
Data Bits | 8 |
Stop Bits | 1 |
Serial Port Login Device
- Initial Login via Console Port: Connect to the device through the Console port. After pressing Enter, a login prompt will appear.
Welcome to minicom 2.7                                OPTIONS: I18n
Compiled on Nov 15 2018, 20:18:47.
Port /dev/ttyUSB1, 11:24:17
Debian GNU/Linux 9 sonic ttyS0
sonic login:- Log in to the device using the default username and password
sonic login: admin
Password:
Last login: Thu Nov 3 17:17:59 UTC 2016 from 192.168.0.79 on pts/0
Linux sonic 5.10.34-asternos #5 SMP PREEMPT Thu Jul 14 08:20:14 EDT 2022 aarch64
    _          _                _   _   ___   ____
   / \    ___ | |_   ___  _ __ | \ | | / _ \ / ___|
  / _ \  / __|| __| / _ \| '__||  \| || | | |\___ \
 / ___ \ \__ \| |_ |  __/| |   | |\  || |_| | ___) |
/_/   \_\|___/ \__| \___||_|   |_| \_| \___/ |____/

------- Asterfusion Network Operating System -------

Help: http://www.asterfusion.com/

Last login: Wed Jun 23 06:44:22 2021 from 192.168.10.198
...Entering cli view, please wait...
sonic#
- Configure the management network port IP address
sonic# configure
sonic(config)# interface mgmt 0
sonic(config-mgmt- 0)# ip address 30.1.1.2/24 gw 30.1.1.1
sonic(config-mgmt- 0)# vrf mgmt- Save Configuration
sonic# write
save running-config ...
Existing files will be overwritten, continue? [y/N]: y
Running command: /usr/local/bin/sonic-cfggen -d --print-data > /etc/sonic/config_db.json
Familiar with using CISCO-LIKE command lines
How to Enter the Command Line View
Operation | Command | Description |
|---|---|---|
Enter the CLI view | sonic-cli | By default, upon logging into the device, you will automatically enter the command line view. If not, use 'sonic-cli' |
Exit the CLI view | system bash | By default, use the 'system bash' command to return to the shell view. Use 'exit' if entering the cli view by 'sonic-cli' before. |
Commond Keywords
Keywords | Description |
|---|---|
no | Cancel or disable a specific setting |
show this | Display the current configuration of the current view |
configure terminal | Enter the system configuration mode |
delete | Delete a configuration file |
reboot | Reboot the device |
write | Save the current configuration |
shutdown | Disable or turn off a port |
end | Return to privileged user mode |
exit | Exit to the previous level or log out |
Command Line Usage Assistance
When entering an incomplete keyword, pressing the Tab or Space key will automatically complete the keyword.
If you encounter issues while using the command line, you can utilize the help function to get assistance, eliminating the need to memorize extensive and intricate commands.
While entering a command, pressing the Tab key will display a list of matching keywords. Entering "?" will provide hints for relevant keywords or explanations of parameters.
sonic# show <tab>
acl       arp       counters     history     image      interface    link-aggregation
lldp       mac-address   platform     running-config  startup-config  sub-interface  traffic
sonic# configure terminal
sonic(config)# access-list l3 test ingress <tab>
 <cr>
sonic(config)# access-list l3 test <enter>
Syntax error: The command is not completed
sonic(config)# access-list l3 test1 ingress
sonic(config-l3-acl-test1)# ?
 end  Exit to the exec Mode
 exit Exit from current mode
 no  Negate a command or set its defaults
 rule Add an access list entry
 show show running-config

sonic(config-l3-acl-test1)# rule ?
  rule ID (0..500)
sonic(config-l3-acl-test1)# rule 1 ?
 source-mac     Specify source mac address
 destination-mac   Specify destination mac address
 ethernet-type    Specify ethernet protocol type
 outer-vlan     Specify outer VLAN id
 vlan-pri      Specify outer VLAN priority
Configuration File Management
The configuration files for this series of switches are in JSON (JavaScript Object Notation) format. JSON is a lightweight data interchange format, and its file extension is typically .json.
Viewing Configuration File
By default, the system configuration files are stored in the /etc/sonic directory. The default system configuration file is named config_db.json. When performing configuration saving or restoration operations, it's this file that gets modified, determining the initial configuration upon the device's next startup. Additionally, this directory also contains backups of configuration files, labeled with timestamps, which facilitates configuration recovery for users. Every time the "write" command is executed, a new config_db.json file is generated to save the current configuration, and the original file's name is modified to the format config_db+timestamp.
Configuration Saving
After a user logs into the device, configurations made through command-line operations or other means are temporary. If you require persistent configurations, you should manually save the modified settings. This involves updating the current configuration to the default configuration file, config_db.json. If you don't save the configurations, the device's settings will revert to their state before modifications after a reboot.
OperationMaintenance Interface | Command | Description |
|---|---|---|
Save configuration | write | |
Display startup configuration | show startup-config | |
Equipment Upgrade
The device supports multiple ways to copy the version image to the device to be upgraded.
Copying Images Using TFTP
The device and the file server communicate with each other. The device functions as a TFTP client and the file server functions as a TFTP server. You need to download the version image stored on the server to the device and complete the software version upgrade.
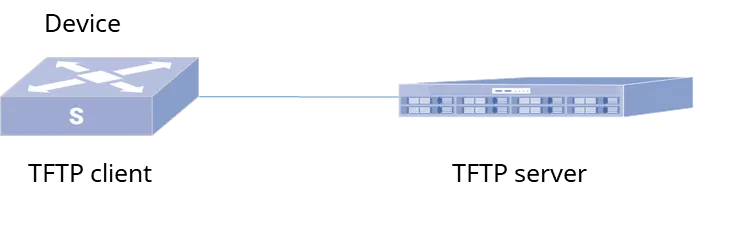
1. Configure the IP address of the file server to ensure that the fileserver and the device are reachable.
2. Start the TFTP server of the Device and complete the version image download
admin@sonic:~$ tftp
tftp> help
tftp> connect
(to) 150.1.0.1
tftp> get AsterNOS-V5.2R001.bin
Received 17437 bytes in 0.0 seconds
tftp> quit
admin@sonic:~$ ls
AsterNOS-V5.2R001.bin
Copy the image using SCP
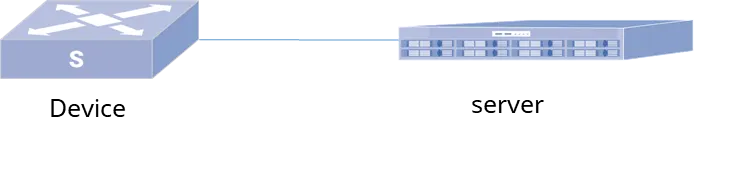
1. Configure the IP address of the file server to ensure that the file server and the device are reachable.
2. Use the SCP command on the device to complete the version image download
admin@sonic:~$ sudo scp [email protected]:/share/AsterNOS-V5.2R001.bin
admin@sonic:~$ ls
AsterNOS-V5.2R001.bin
Copy the image using a USB drive
This method is suitable for the current no network environment but need to copy the version image to the device. Usually, the USB interface of the device is located on the front panel of the device.
- Insert the USB disk containing the system image into the USB port of the device
- Execute the command to view the disk name corresponding to the USB disk:
admin@sonic:~$ sudo /sbin/fdisk -l- Create a directory for mounting the USB drive
admin@sonic:~$ sudo mkdir /mnt/usb/- Mount the USB drive. For example, the path of the USB drive is /dev/sdb4 . Please refer to the actual path.
admin@sonic:~$ sudo mount /dev/sdb4 /mnt/usb- Enter the disk directory and copy files from the disk to the device
admin@sonic:~$ cd /mnt/usb
admin@sonic:/mnt/usb$ sudo cp AsterNOS-V5.2R001.bin /home/admin
Executing the Upgrade Command
Operation | Command | Description |
|---|---|---|
Execute the upgrade command | image update image-name | If a configuration upgrade is required, please execute the "write" command to save the configuration before proceeding with the upgrade. Once the upgrade is completed without any errors, you'll need to manually restart the device to switch to the new version |
Display the version | show version | - |